.svg)
The 30 days before your first ride are where launches are won or lost. Most operators overspend on vehicles, then arrive at go-live with no permit, no zones drawn, and a payment flow nobody tested. This checklist fixes the sequence. It is dated, grouped into four weeks, and built so the slow external dependencies (permits and insurance) start on day 30, while the fast in-platform work (zones, pricing, app branding) lands in the final stretch when your vehicles are already in hand.
Levy Fleets runs on a $0-upfront, revenue-share model: you pay when riders pay, at 20% of GMV under 100 active vehicles (15% at 100 to 249 vehicles on qualifying annual terms), with a $250 per month platform minimum. The platform is not what drains your launch budget. Your capital goes to vehicles, permits, and the ground game, so work this list in order and go live with a fleet that earns from day one instead of one sitting in a warehouse waiting on paperwork. New to the business entirely? Start with the guide to starting an electric scooter rental business, then come back and run this countdown.
Get professional advice first
This checklist is operational guidance, not legal, tax, insurance, or financial advice. Permit rules, insurance requirements, entity setup, and tax treatment vary by city, state, and country, and they change often. Confirm your specific obligations with a licensed attorney, insurance broker, and accountant before you launch.
How to use this checklist
Set your go-live date first, then count backward. The two long-lead items (city permit and commercial insurance) sit in Week 1 because they depend on other people and can take weeks. Do not reorder them to the end.
Week 1 (Days 30 to 24): Legal, financial, and market foundation
This is the paperwork week. None of it is glamorous, and all of it blocks your launch if you start late.
Lock your entity and commercial insurance
Confirm your operating entity is registered and open a business bank account for rider payouts, then bind commercial general liability coverage sized to your market, especially for larger or publicly branded fleets. Levy does not provide operator or rider insurance, so this policy, bought through your own broker, is what covers your business.
File your city permit or confirm you do not need one
Permit timelines are the most common reason a launch slips. Some cities require a competitive application, a vehicle cap, and proof of insurance before you place a single scooter, so start this on day 30. Levy gives you the compliance plumbing cities ask for, including MDS 2.0 provider feeds, GBFS 3.0 feeds, and real-time geofence enforcement, which answers the data-sharing requirement in most applications.
Confirm your market and rough zone map
Decide your service area, your highest-demand corridors, and the parking and no-go areas you will enforce. You do not draw the geofences yet. You just need the map so that when vehicles arrive, you can configure zones fast.
Choose your Levy plan and sign
Pick Managed (Levy runs support, payments, disputes, and collections at 20% of GMV) or Software-Only ($14 per vehicle per month, in-house operations, at 100 to 249 vehicles). Signing now unlocks the operator dashboard so setup runs in parallel with hardware shipping.
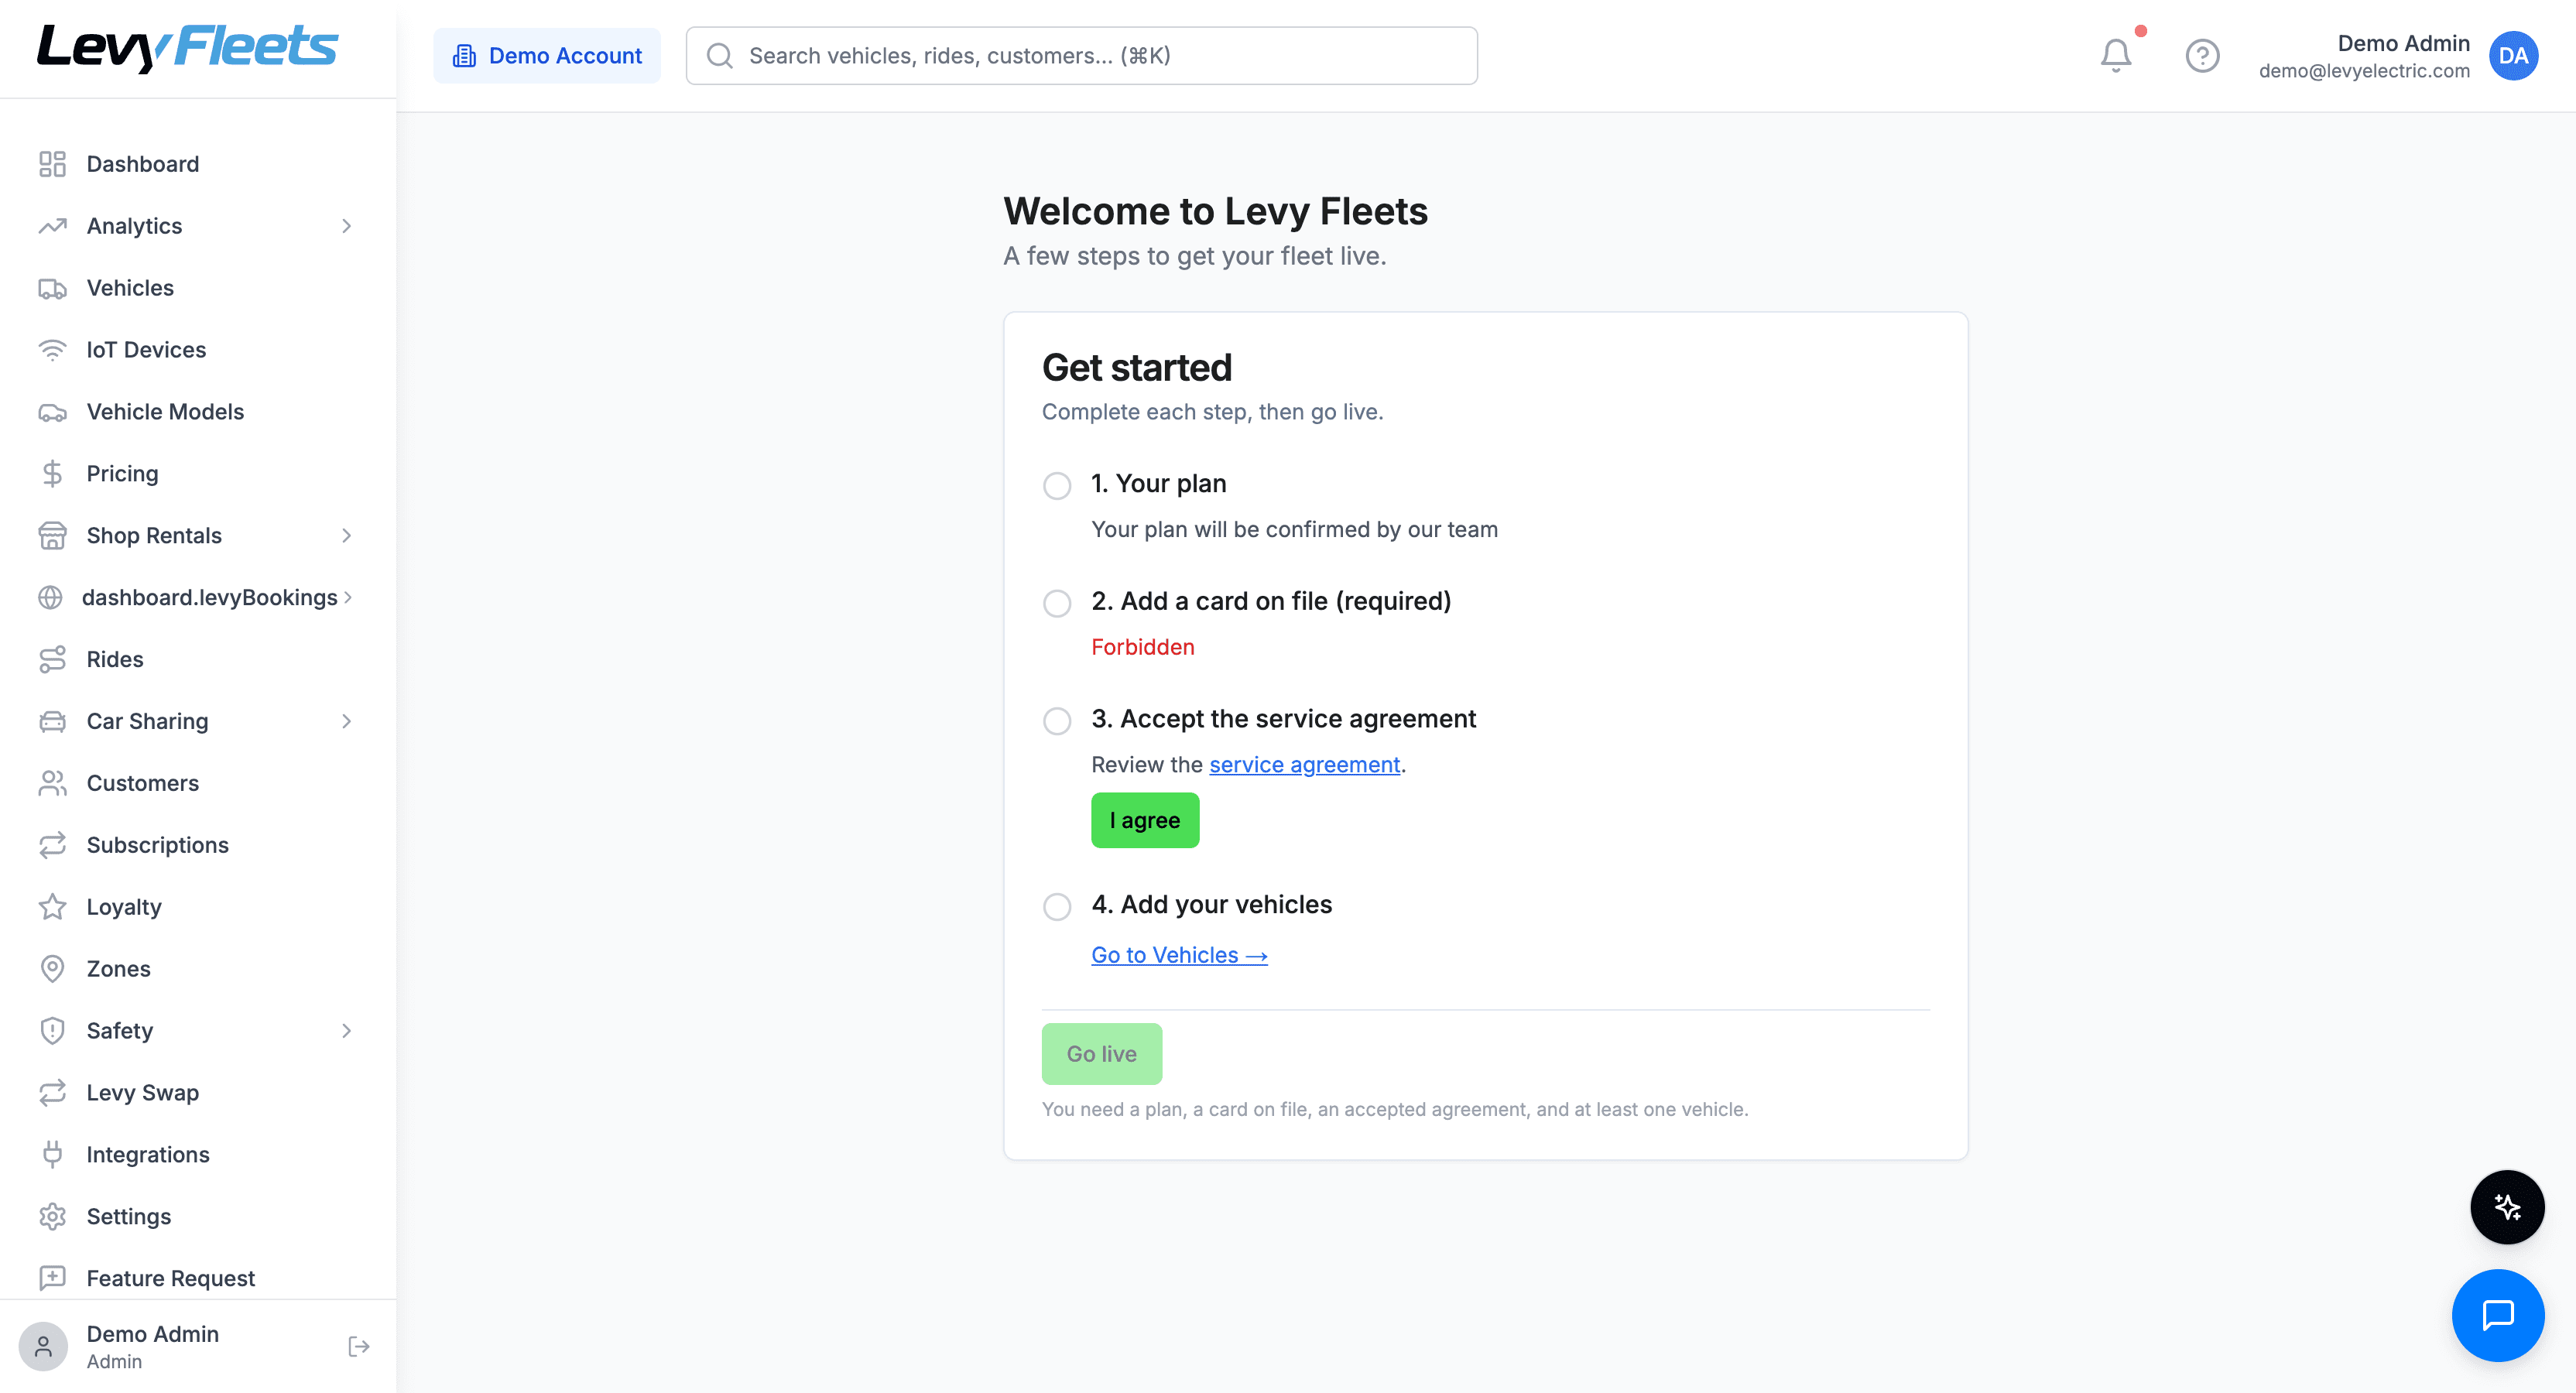
Once you sign, the dashboard opens with a guided setup checklist that mirrors the back half of this countdown, so you can work the in-platform steps in order as your hardware ships.
Do not skip the permit clock
If your city runs a permit program, assume it gates everything else. Vehicles in a warehouse earn nothing while an application sits in review. File first, configure second.
Week 2 (Days 23 to 17): Vehicles received and configured
Hardware arrives this week. The goal is every unit online, tested, and reporting into one dashboard before you touch pricing.
- Receive and inventory every vehicle. Match VINs or serials to your purchase order and log any transit damage immediately.
- Confirm IoT connectivity. Levy is hardware-agnostic across 30+ IoT vendors, so whether your vehicles are native-connected (OKAI, Segway, Niu) or brought online with retrofit modules (Queclink, Teltonika, Comodule), confirm each one reports GPS, battery, and lock state into the operator dashboard.
- Test remote lock and unlock on every unit. Do not sample. A vehicle that will not lock is a vehicle you cannot rent. GPS, remote lock and unlock, battery monitoring, speed tracking, geofencing, and real-time status are standard across the fleet, so verify each one per vehicle.
- Set your battery and charging plan. If your vehicles use swappable packs, enable Levy's Battery Swap tooling: pack state-of-health tracking, swap-station inventory, and the gig Juicer and Charger marketplace with bounties and payouts. A fixed-battery vehicle takes roughly 4 to 8 hours to recharge (the exact time varies by vehicle and pack, so check your model's spec) and is dead the whole time, so plan spare packs accordingly.
- Stock your first spare parts. Levy keeps US stock of common OKAI, Segway, and similar parts (tires and tubes, brake cables and pads, display panels, batteries, throttle assemblies) and ships in days, not weeks. Order a starter kit now so a first-week breakdown is a two-day fix, not a two-week hole.
Warranty is handled for you
OKAI hardware carries a 90-day warranty from delivery covering manufacturing defects. Levy files the claim with the manufacturer on your behalf, so log any dead-on-arrival unit this week while the clock is fresh.
Week 3 (Days 16 to 10): Zones, pricing, payments, and app branding
Vehicles are live and tested. Now you configure the rider experience. This is fast, in-platform work.
Draw your zones and geofences
Turn last week's rough map into real geofences: service areas, parking zones, no-go areas, and speed-limit zones. Configure out-of-zone parking rules and parking rewards to steer riders toward the spots you want. Stacked-geofence priority means a school no-go zone can override a broader service area automatically.
Set pricing, promotions, and packages
Configure your unlock fee, per-minute rate, and any subscriptions, packages, or promotions. Levy supports dynamic pricing, but you set the rules. If you add AI Ops later, note that it forecasts demand and ranks rebalancing recommendations by ROI. It does not auto-execute moves and is not surge pricing, so your published rates stay in your control.
Wire up payments and the rider wallet
Payments run through Stripe with Levy's volume pricing of 2.6% + $0.20 per transaction. On Managed, Levy runs the rider wallet, disputes and chargebacks, and collections and dunning for you. Turn on identity verification and fraud prevention (SoCure, Experian, and Stripe Identity) before you take a real payment.
Choose your app branding
Decide between Levy Label (launch on the Levy rider app with $0 setup) and a fully white-label rider app on iOS and Android for a $2,750 one-time fee. If you want your own brand in the stores, start the white-label build now, because app-store review adds days you cannot compress at the end.
Week 4 (Days 9 to 1): Staffing, marketing, safety, and soft launch
The final stretch is about people, demand, and one real test before you open to everyone.
- Set staffing and support coverage. Decide who charges, swaps, rebalances, and repairs. On Managed, Levy provides 24/7 support, disputes, and collections, which shrinks the headcount you need on day one, and the Juicer and Charger marketplace can cover charging as gig labor instead of a payroll line.
- Load your marketing. Use Marketing Automation for audience segments, drip campaigns, A/B tests, and lifecycle messaging, plus the included Google Ads and Facebook tooling for launch-day acquisition. Have your launch offer and first two emails scheduled before go-live.
- Configure Levy Vision safety enforcement. Turn on helmet verification at unlock, parking-pose validation at ride end (the classifier checks that the vehicle is upright, inside the parking zone, not blocking the sidewalk, and photographed clearly), and sidewalk detection with throttle-cut enforcement. Set your Rider Score interventions and reward tiers now too.
- Run a soft launch with a limited fleet. Put 10 to 20 vehicles on the street with a small group of real riders for 3 to 5 days. Watch analytics for stuck rides, failed locks, payment declines, and parking appeals. Fix what breaks while the blast radius is small.
- Do a full go-live dry run. Complete one real ride end to end yourself: unlock, ride, park in a zone, submit the parking photo, and confirm the charge and payout landed correctly.
Green-light criteria
Go live only when all of these are true: permit approved or not required, commercial insurance bound, every vehicle locks and reports, zones and pricing live, payments and identity verification tested with a real charge, and a soft launch completed with no open blockers.
How to start an electric scooter rental business
The full playbook behind this checklist: market selection, unit economics, and the launch-ready stack, with $0 upfront and revenue share.
Frequently asked questions
Put it into practice
A clean launch is a sequencing problem, not a heroics problem. Start the slow external items on day 30, get every vehicle online and tested by the end of Week 2, and spend the final ten days on the rider experience and one real soft launch. Want help mapping this countdown to your market and vehicle mix? Book a demo and we will walk your 30-day plan with you, from permit data feeds to zones, pricing, and go-live.