Feishen IoT SIM Replacement
Use this guide to replace the physical SIM card inside the Feishen display IoT module.
Feishen hardware only
Use this procedure only for the black Feishen display IoT shown below. Do not use the Segway Max Plus / Queclink procedure for this hardware.
Identify the Correct IoT Module
The SIM is inside the black Feishen display IoT module with the round battery indicator, white button, and attached wiring harness.
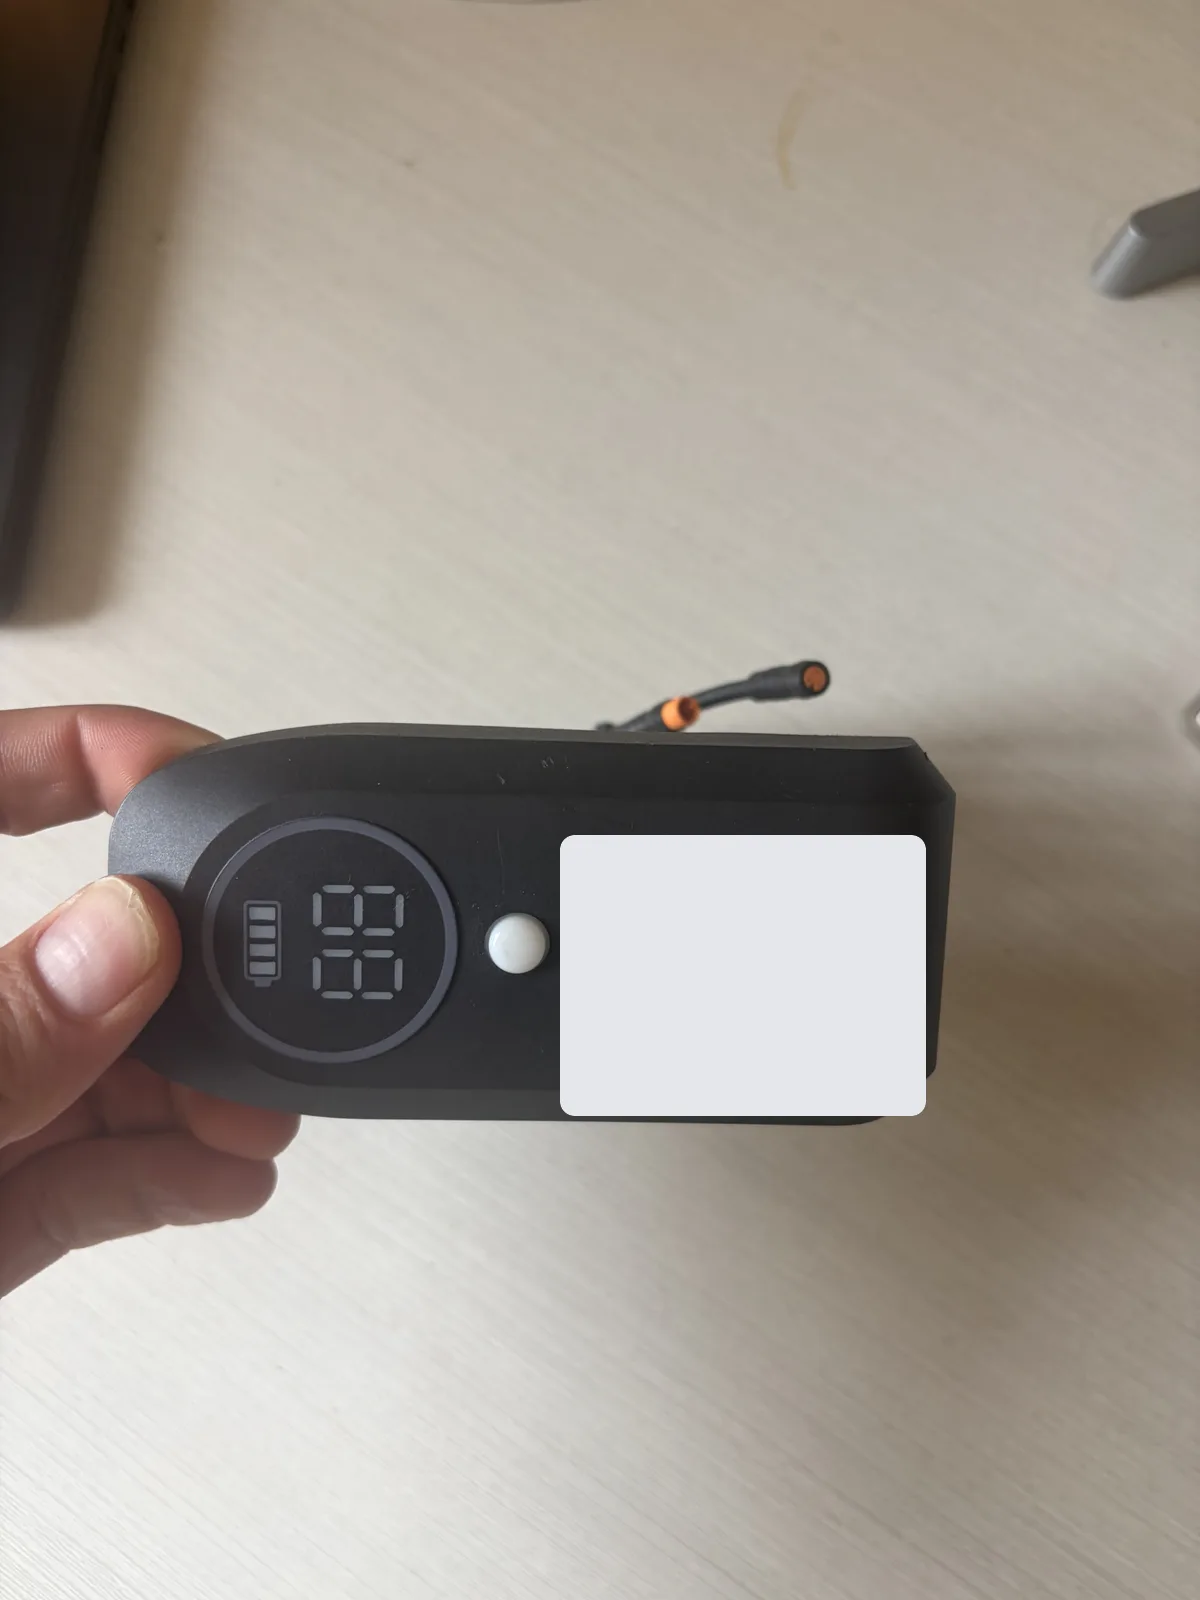
Front of the Feishen display IoT module. The QR label is redacted in this reference photo.
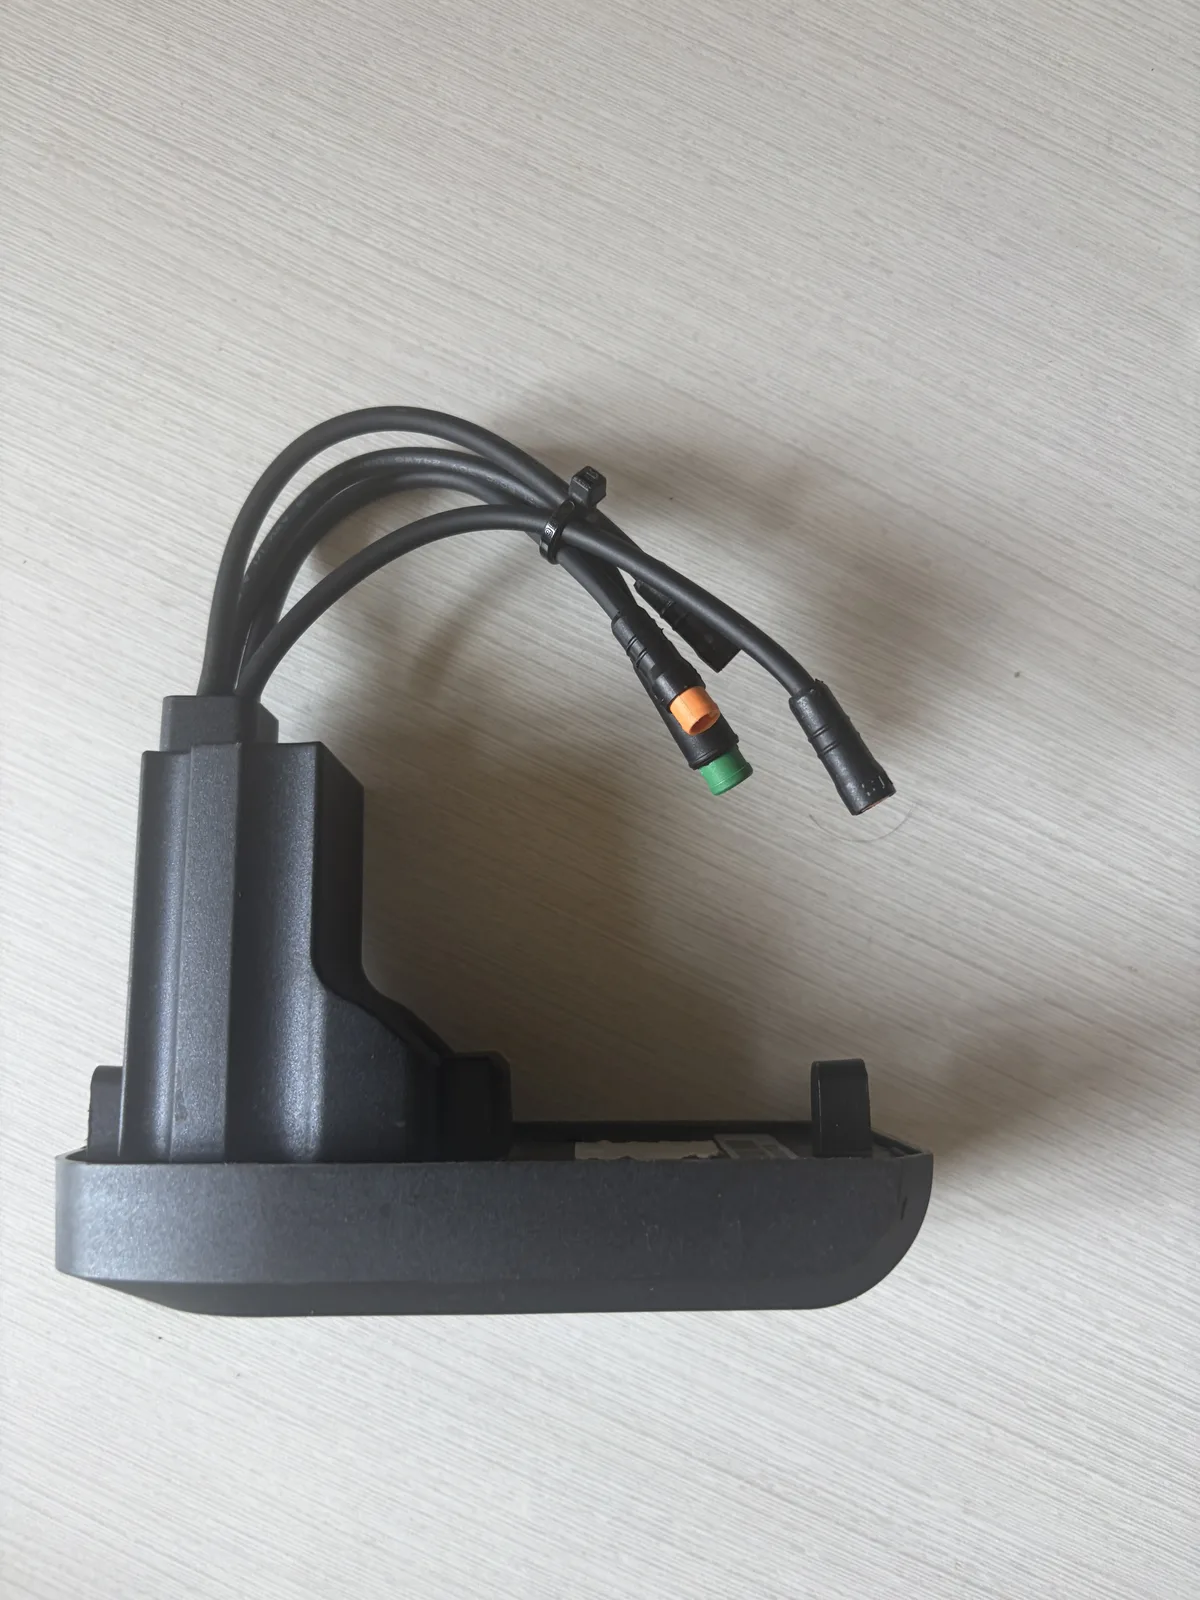
Side view of the same IoT module and connector harnesses. Take a photo of the connector routing before unplugging anything.
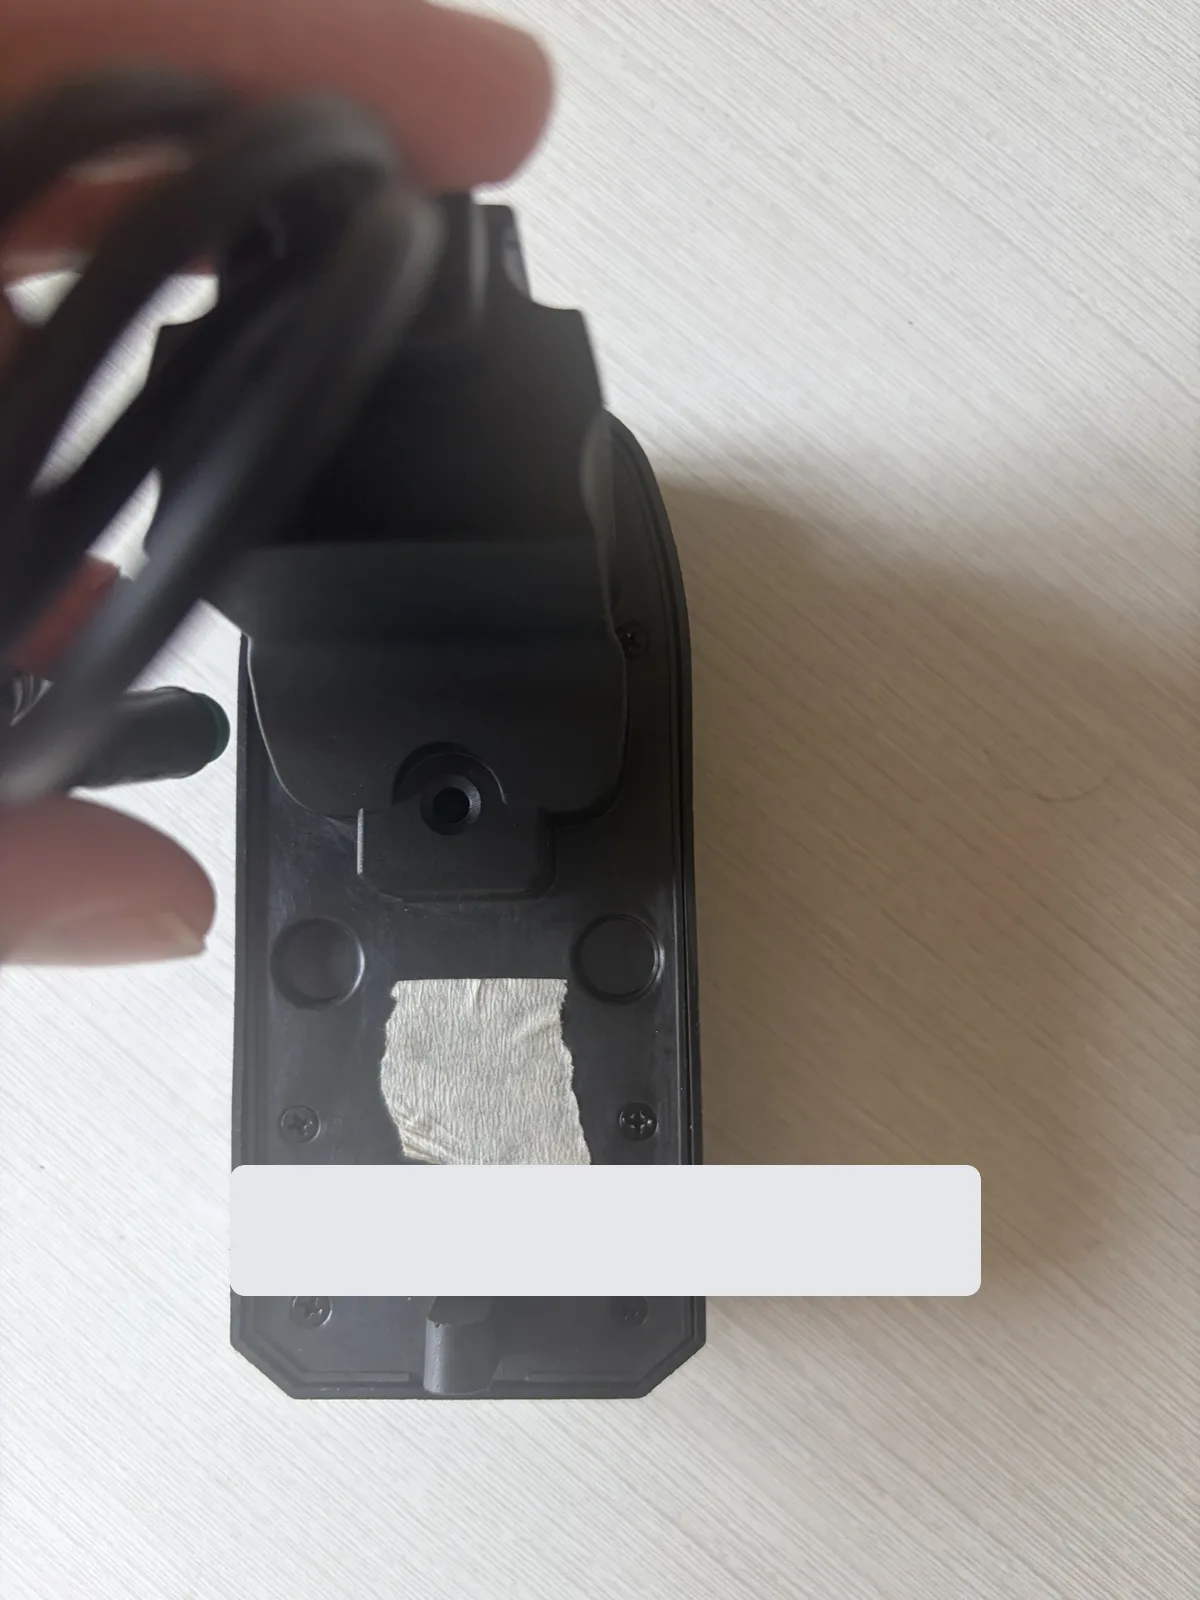
Back of the IoT module. Remove the perimeter screws to open the enclosure and reach the SIM holder inside. The IMEI label is redacted in this reference photo.
Before You Start
Replace the SIM in one scooter first. Confirm that scooter reconnects before opening the rest of the fleet.
What You'll Need
- The activated replacement SIM supplied for the scooter
- A small Phillips screwdriver or the matching driver for the IoT enclosure screws
- A plastic opening tool
- A clean, dry work surface and a small container for screws
- A phone with the Omni BLE Tool or BLE Tool Plus app for post-replacement configuration
Power the Scooter Down
- End any active ride and turn the scooter off.
- Remove the main battery or otherwise disconnect the scooter from power.
- Wait at least 30 seconds before opening or unplugging the IoT.
Protect the electronics
Never change the SIM while the scooter is powered. Work somewhere dry, avoid touching exposed components, and do not pry with a metal tool.
Step 1: Remove the Display IoT Module
- Open the scooter enough to access the display IoT module and its cable bundle.
- Take a clear photo of the connectors and cable routing before disconnecting them.
- Disconnect the harnesses by holding the connector bodies, not the wires.
- Remove the display IoT module from the scooter and place it face-down on a clean work surface.
If the connector colors or housing do not match the reference photos, stop and send photos to support before continuing.
Step 2: Open the IoT Enclosure
- Flip the module over so the back cover and screws are visible.
- Remove the perimeter screws from the back cover.
- Lift the back cover slowly. If it resists, check for a missed screw instead of forcing it open.
- Keep the screws organized so each one goes back into the same enclosure.
Step 3: Replace the SIM
- Locate the SIM holder inside the IoT module.
- Before removing the old SIM, take a close photo showing the notched-corner orientation.
- Release or slide out the old SIM using the holder's normal movement. Do not bend the holder.
- Insert the replacement SIM in the same orientation.
- Confirm the replacement SIM sits flat and fully seated.
Do not force the SIM holder
If the SIM holder is not visible after opening the back cover, or if the holder does not release normally, stop and contact support rather than removing boards or shields.
Step 4: Reassemble the IoT
- Confirm the SIM is seated and no loose screws or tools remain inside the enclosure.
- Reinstall the back cover.
- Tighten the perimeter screws evenly until snug. Do not overtighten them into the plastic.
- Reconnect the IoT harnesses in the same positions shown in your reference photo.
- Reinstall the IoT module in the scooter.
- Reconnect the main battery and power the scooter on.
Step 5: Configure and Verify the Scooter
After a physical SIM change, confirm the cellular settings and connection:
- Use Feishen Scooter BLE Configuration to confirm the server, port, and APN are correct.
- Save the settings and reboot the IoT if the BLE tool requires it.
- Allow two to three minutes for the IoT to reconnect.
- In Levy Fleets Dashboard > IoT Devices, search for the scooter by IMEI.
- Confirm it shows Online with recent telemetry before replacing SIMs in other scooters.
Troubleshooting
The scooter stays offline after the SIM swap
- Reopen the IoT enclosure and confirm the SIM is fully seated
- Confirm the SIM is activated and assigned to the correct scooter
- Use the BLE configuration guide to confirm the APN, server, and port
- Power-cycle the scooter and wait two to three minutes after reboot
The BLE tool cannot find the scooter
- Stand within a few feet of the scooter
- Confirm Bluetooth and Location permissions are enabled
- Confirm the scooter has power
- Power-cycle the scooter and scan again
Finish one scooter before the fleet
Once the first scooter is online and reporting recent telemetry, repeat the same process on the remaining Feishen scooters.
Running a fleet on this hardware?
Levy Fleets runs scooters, e-bikes, mopeds and golf carts on the IoT hardware you already have, with integration pages for 29 vendors including Segway, Okai, Omni, Queclink, Invers and Comodule. Keyless unlock, geofencing, rider payments and rider support are included, and the Managed plan is a share of revenue with no per-vehicle software fee.